Documentation index: llms.txt. This page is also available as markdown: append .md to this URL or send Accept: text/markdown.
Command Line Interface
This page walks you through installing and configuring the Coalesce CLI, coa, for Snowflake: system requirements, authentication, access tokens, Environment details, local config, and how source Nodes fit into your workflow.
Currently Snowflake is the only supported platform for coa version 7.33 and above.
Local Development vs. Cloud Operations
coa has two distinct modes of operation, and understanding the difference will help you know which steps in this guide apply to you.
Local Development
Local development is how you build and iterate on pipelines. You work directly against your warehouse using the files from your version control checkout. You do not need a connection to Coalesce cloud. You edit SQL, preview the generated DDL, create tables, run DML, and check results in your SQL client. This loop is fast because you skip the full plan and deploy cycle entirely while you're still building.
Cloud Operations
Cloud operations are how you promote a finished pipeline and keep it running. Once your pipeline works the way you want locally, you generate a deployment plan, apply it to a Coalesce Environment, and schedule refreshes through Coalesce cloud. These commands require a Coalesce access token, your domain URL, and an Environment ID.
Most of the setup steps below apply to both modes. Steps that are only needed for cloud operations are marked with a ☁️ Cloud only label.
System Requirements
Use the minimum table to confirm your workstation can install and run the CLI. Use the recommended table when you want more headroom for larger Projects or parallel work.
Minimum System Requirements
| Component | Requirement |
|---|---|
| OS | 64-bit Windows 10, macOS 11, Linux kernel version 5.0+ |
| Processor | AWS t2.medium 4X vCPU or equivalent, Apple M1, Intel Core i3-10100 4 Core or better, or AMD Ryzen 3 1200 4 Core or better |
| RAM | 8 GB+ |
| Storage | 1 GB+ free space |
| Network | Access to Snowflake instance; access to Coalesce cloud for cloud operations |
| Node version | v20.x |
Recommended System Requirements
| Component | Requirement |
|---|---|
| OS | 64-bit Windows 10, macOS 11, Linux kernel version 5.0+ |
| Processor | Apple M1 or newer, AWS t2.medium 8X vCPU or equivalent, Intel i3 8X Core or higher, or AMD Ryzen 3 8X Core or better. Choose Apple M1 or newer when you can. |
| RAM | 16 GB+ |
| Storage | 1 GB+ free space |
| Network | Access to Snowflake instance; access to Coalesce cloud for cloud operations |
| Node version | v20.x |
Before You Begin
What you need depends on how you use the CLI.
- Local development - You need your warehouse credentials and a Coalesce Project on your machine. For a new Snowflake project, run
coa initto generateworkspaces.ymland related files. See Build Pipelines With the Coalesce CLI.
When you deploy pipelines through Coalesce cloud, you need a Project, a Workspace, and an Environment before you run coa plan or coa deploy. You can create the Project and Environment in the Coalesce App or with coa projects create and coa environments create. Then add a data source, commit your project to your repo, and continue with deploy.
Existing customers can use an existing repository.
Installation
Use npm to install or update the global CLI package, then confirm the binary is on your PATH:
- To install:
npm install -g @coalescesoftware/coa - To update:
npm upgrade -g @coalescesoftware/coa - To verify:
coa --version
Authentication
The Coalesce CLI supports Snowflake Key Pair Authentication and Basic Auth. You'll also need a Coalesce access token for cloud operations.
Snowflake
- Snowflake Key Pair Authentication
- Snowflake Basic Authentication
- Go through the steps in Key Pair Authentication to generate your keys.
- Save the private key file path. You'll need it for the CLI config and the Coalesce App.
- Generate your public key using the private key.
- Assign the public key to your Snowflake user.
- ☁️ Cloud only - Add your key pair to your Environment.
When entering your private key, include the full PEM block including the BEGIN ENCRYPTED PRIVATE KEY and END ENCRYPTED PRIVATE KEY lines. Escape special characters with \. For example:
- Original passphrase:
hnw6a#n - Escaped passphrase:
hnw6a\#n
Be sure to escape # pound signs and : semicolons.
-----BEGIN ENCRYPTED PRIVATE KEY-----
...hnw6a\#n....
-----END ENCRYPTED PRIVATE KEY-----
Basic authentication only requires your Snowflake username and password. This method is not recommended for automation. If you use OAuth to log into Snowflake, you'll need to use Key Pair for the CLI.
- Follow the instructions in Snowflake Username and Password.
- Save your credentials for the CLI config file.
- ☁️ Cloud only - Add the credentials to your Environment.
☁️ Cloud Only: Coalesce Access Token
You need a Coalesce access token to run coa plan, coa deploy, coa refresh, and any API-style commands. Local development commands (coa init, coa create, coa run, coa validate, coa doctor) do not require a token.
Go to the Deploy tab and click Generate Access Token.
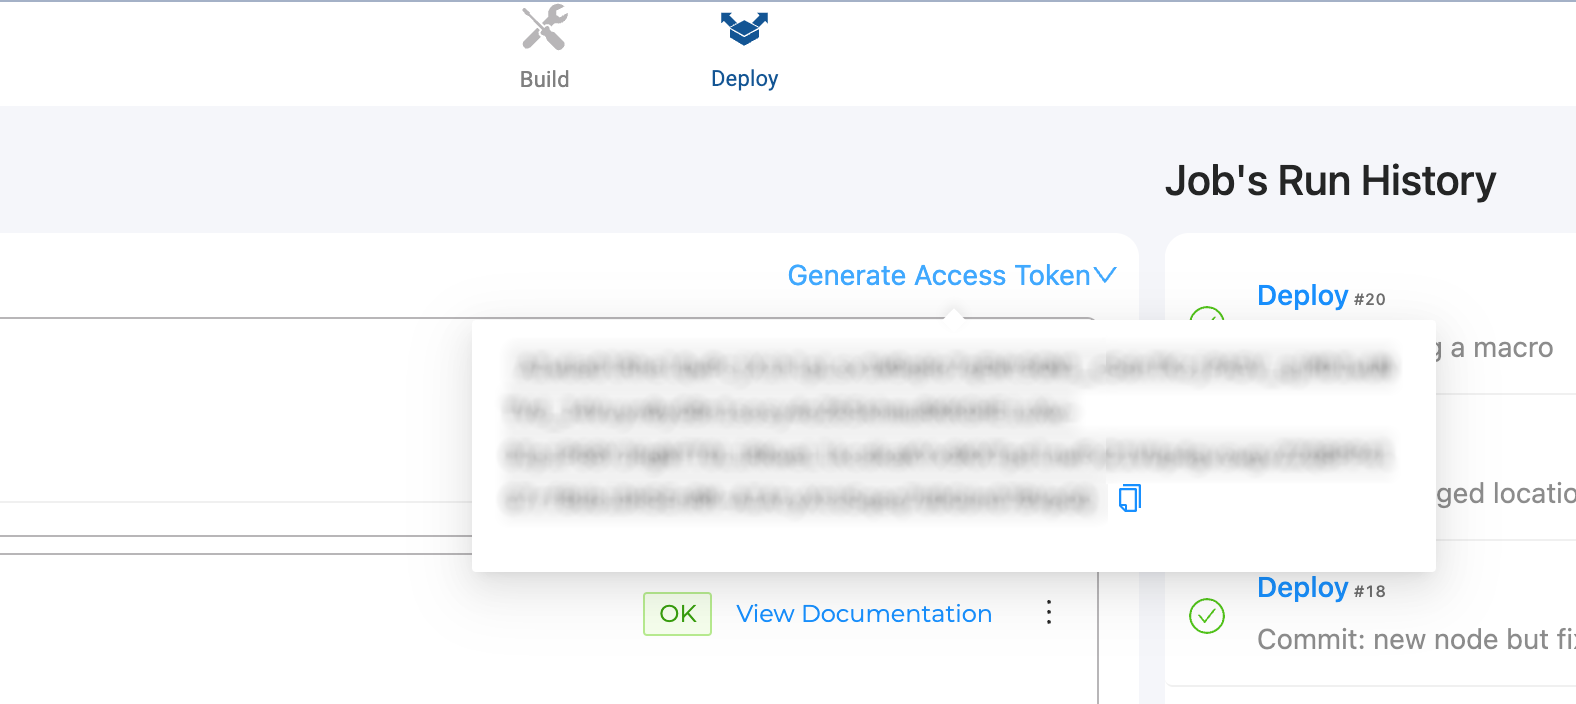
If you sign in to the Coalesce App with SSO, plan on generating a new access token for each new Environment you create.
☁️ Cloud Only: Get Your Environment ID
Get your Environment ID with coa environments list.
☁️ Cloud Only: Get Your Domain URL
Your domain is the base URL you use to sign in to Coalesce. The value is the same one you use in your CLI domain field. Examples:
https://<company-name>.coalescesoftware.iohttps://<company-name>.pp.us-east-2.aws.coalescesoftware.iohttps://app.eu.coalescesoftware.iohttps://<your-private-link-url>
Creating Your CLI Config File
Create ~/.coa/config without a file extension inside a .coa folder in your home directory:
~/
└── .coa/
    └── config
For local development, you only need your warehouse credentials. The token, domain, and environmentID fields are only required when you run cloud commands.
- Snowflake Key Pair
- Snowflake Basic
[default]
snowflakeAuthType=KeyPair
snowflakeAccount=your-account.region.cloud
snowflakeKeyPairKey=file_path_to_private_key
snowflakeKeyPairPass=private_key_passphrase_if_applicable
snowflakeRole=snowflake_user_role
snowflakeUsername=snowflake_user_name
snowflakeWarehouse=snowflake_warehouse

# ☁️ Cloud only: add these when you're ready to deploy
environmentID=your_environment_id
token=your_access_token
domain=your_domain_url
Not recommended for automation.
[default]
snowflakeAuthType=Basic
snowflakeAccount=your-account.region.cloud
snowflakeUsername=username
snowflakePassword=password
snowflakeRole=SYSADMIN
snowflakeWarehouse=snowflake_warehouse

# ☁️ Cloud only: add these when you're ready to deploy
environmentID=your_environment_id
token=your_access_token
domain=your_domain_url
With warehouse credentials in place, you're ready to build pipelines locally. Add the cloud fields when you're ready to deploy.
Profiles
A profile is a section of ~/.coa/config. Each section holds the credentials for one setup, for example a local development warehouse, a staging environment, and production. Keep as many profiles as you need in the one file and choose between them per command or per Workspace.
Pass --profile <name> on any command to run it against a specific profile:
coa plan --profile snowflakeAdmin
[default] is the base layer, not a required section. Every named profile inherits any field it does not set from [default], so put the values your profiles share, such as token and domain, in [default] and let each named profile carry only what differs. A config file with no [default] section at all works too, as long as each Workspace binds the profile it runs on. Cloud commands need token and environmentID in the profile they resolve to, whether those fields come from the named section or from [default].
[default]
token=<Coalesce API Token>
environmentID=<Coalesce ENV ID>
domain=<Coalesce APP URL>

[snowflake-key-pair]
platformKind=Snowflake
snowflakeAuthType=KeyPair
snowflakeAccount=your-account.region.cloud
snowflakeKeyPairKey=<Snowflake Key Pair Key or File Path>
snowflakeRole=<Snowflake Role>
snowflakeUsername=<Snowflake User Name>
snowflakeWarehouse=<Snowflake Warehouse>
environmentID=<Coalesce ENV ID>

[snowflake-basic]
platformKind=Snowflake
snowflakeAuthType=Basic
snowflakeAccount=your-account.region.cloud
snowflakeUsername=<Snowflake Account Username>
snowflakePassword=<Snowflake Account Password>
snowflakeWarehouse=<Snowflake Warehouse>
snowflakeRole=<Snowflake User Role>
environmentID=<Coalesce ENV ID>
Manage Profiles With coa profile
The coa profile commands read and write ~/.coa/config for you, so you can inspect and change profiles without hand-editing the file.
| Command | What it does |
|---|---|
coa profile list | Shows every profile in the config file with its platform and whether it carries cloud credentials, plus which profile a command run in this directory would use and why. |
coa profile show <name> | Shows one profile's own fields and the effective profile coa composes from it, which is the section layered over [default]. Credentials are redacted in both. |
coa profile create <name> | Collects warehouse credentials for one platform, runs a live connection test, and writes a new section. Nothing is written unless the test passes. |
coa profile set-cloud <name> | Stores Coalesce cloud credentials, the access token, the domain, and optionally the Environment ID, in a profile, creating the section if it isn't there yet. |
coa profile use <name> | Binds the current Workspace to a profile. |
coa profile unset | Removes the profile binding for the current Workspace. |
coa profile rename <name> <newName> | Renames a profile in place. |
coa profile delete <name> | Removes a profile from the config file, keeping a copy in ~/.coa/config.backup. |
Add --json to any of these to get machine-readable output for scripts and agents, and --config <path> to work on a config file somewhere other than ~/.coa/config.
The two halves of a profile are written by different commands: coa profile create collects warehouse credentials, and coa profile set-cloud stores the Coalesce token and domain. coa init does both at once for a Workspace you're setting up.
Renaming or deleting default is refused, because every other profile inherits from it. Deleting or renaming a profile the current Workspace is bound to fixes that binding too, so nothing points at a profile that no longer exists.
Profile names may contain letters, digits, spaces, and most punctuation. What's refused is anything the config file would read back as a different name: ., ;, #, ], and line breaks, along with an empty name and one that starts or ends with a space.
How coa Chooses a Profile
coa resolves the profile in this order and uses the first one it finds:
- The
--profile <name>flag on the command. - The profile the Workspace is bound to, written by
coa profile use. - The
profile=key in the[default]section of~/.coa/config. default.
Run coa profile list to see which profile applies in a directory and which of these four decided it. coa doctor names it too, on its summary line.
Commands that act on a directory follow this whole order: coa run, coa create, coa sources, coa install, coa init, coa doctor, coa auth warehouse login, and the local SQL Coalesce Desktop runs for you. Cloud operations, coa plan, coa deploy, coa refresh, and the other Environment commands, deliberately skip step 2: they aren't scoped to a checkout, so they resolve from --profile and the config file alone. Pass --profile explicitly on a cloud command whenever the Workspace binding is what you had in mind. (coa validate resolves no profile at all, so none of this applies to it.)
Bind a Workspace to a Profile
Run coa profile use <name> in a Workspace directory to bind that Workspace to a profile:
coa profile use prod
coa profile use bigquery-dev -d ./my-workspace
Every local command you run in that directory then uses the profile without --profile, and Coalesce Desktop uses it when it opens the Workspace. Pass --profile on a single command when you need to override it, and run coa profile unset to remove the binding and go back to the config file's own default.
The binding is stored in workspace.yml in the Workspace directory. That file holds no credentials, only the profile's name alongside your local Storage Mappings and parameters. Keep it out of Git so each person on the team chooses their own profile; coa init adds it to .gitignore for you, and coa doctor tells you if it isn't covered.
Platform Match
coa profile use refuses a profile whose platform does not match the Workspace, so a Databricks profile cannot be bound to a Snowflake Workspace. coa init refuses the same mismatch before it writes anything, whether the profile declares its platform outright or implies it through the authentication type it stores.
A Workspace with no platform recorded in data.yml is treated as Snowflake, and a directory with no data.yml yet is free to take any platform. coa init never rewrites an existing data.yml, so changing the platform a Workspace runs on means editing that file yourself.
If the profile carries no warehouse credentials at all, coa profile use still binds it and warns you that local execution fails until you add them.
Snowflake, Databricks, and BigQuery Profiles
coa profile create and coa init collect credentials for all three platforms. Pass --platformKind to choose the platform, and pass individual credential flags to skip the prompts:
coa profile create staging --platformKind Snowflake
coa profile create dbx --platformKind Databricks --databricksHost <host> --databricksPath <path> --databricksToken <token>
coa profile create bq --platformKind BigQuery --bigQueryServiceAccountKey ./key.json
Each platform accepts more than one authentication type, chosen with its own flag:
| Platform | Flag | Authentication types |
|---|---|---|
| Snowflake | --snowflakeAuthType | Basic (username and password), KeyPair, OAuth (browser sign-in) |
| Databricks | --databricksAuthType | Token (personal access token), OAuthM2M (service principal) |
| BigQuery | --bigQueryAuthType | ServiceAccount (JSON key file), ApplicationDefault |
coa auth warehouse login, which a Snowflake OAuth profile uses to sign in, chooses its profile the same way every other local command does, so bind the Workspace first or pass --profile.
Add --non-interactive to fail rather than prompt when a required value is missing, which is what you want in CI or when an agent runs the command. Run coa profile create -h for the full credential flag list.
Edit the Config File by Hand
~/.coa/config stays yours to edit. The coa profile commands change only the section they're aimed at, leaving your comments, blank lines, and section order alone, so you can keep notes in the file.
Every value in the file is text, and the file format reads true, false, and null back as something other than the text you typed. A value of exactly one of those three words therefore cannot be stored: rather than write something it would misread later, coa reports that the edit would not read back as intended and changes nothing. Quoting doesn't get around it. In practice this only comes up when a token or password happens to be one of those words, and the fix is to generate a different one.
Configure HTTP and HTTPS Forward Proxies
The CLI configures its default HTTP client for Coalesce API traffic using standard proxy environment variables when the process starts. Set variables in the same shell or job definition you use to run coa, or set them at the machine level if your organization requires it.
Set HTTP_PROXY and HTTPS_PROXY
- Windows Command Prompt
- Windows PowerShell
- macOS and Linux
set HTTP_PROXY=http://your-proxy-address:port
set HTTPS_PROXY=http://your-proxy-address:port
$env:HTTP_PROXY = "http://your-proxy-address:port"
$env:HTTPS_PROXY = "http://your-proxy-address:port"
export HTTP_PROXY=http://your-proxy-address:port
export HTTPS_PROXY=http://your-proxy-address:port
If specific hosts must bypass the proxy, set NO_PROXY to a comma-separated list of host names or CIDR ranges your organization uses for direct routing. Some shells expect the lowercase variable name instead, so use the spelling your environment documents.
Optional Proxy Credentials
Embed a username and password directly in the proxy URL:
- Windows Command Prompt
- Windows PowerShell
- macOS and Linux
set HTTP_PROXY=http://username:password@your-proxy-address:port
set HTTPS_PROXY=http://username:password@your-proxy-address:port
$env:HTTP_PROXY = "http://username:password@your-proxy-address:port"
$env:HTTPS_PROXY = "http://username:password@your-proxy-address:port"
export HTTP_PROXY=http://username:password@your-proxy-address:port
export HTTPS_PROXY=http://username:password@your-proxy-address:port
Proxy URLs that include passwords can appear in process listings and logs on some systems. Prefer proxy accounts designed for automation, URL-encode special characters in credentials when required, and use secret stores your platform supports.
Test Connectivity Before You Run coa
Confirm HTTPS connectivity through the proxy with curl, substituting your Coalesce domain:
curl -x http://your-proxy-address:port https://your-coalesce-domain.example/
If curl succeeds but coa does not, compare environment variables between the two sessions and review proxy or TLS policies with your network team.
What Proxy Settings Apply To
Proxy environment variables configure the standard HTTP client the CLI uses for Coalesce API calls. Other libraries or drivers your workload touches may use different networking stacks. Validate full deploy and refresh paths in your own environment when proxies, custom certificate authorities, or TLS inspection are in use.
Network Connectivity
Which services coa connects to depends on the command you run. Treat network requirements as path-specific: allow Coalesce cloud endpoints for cloud operations, and allow your warehouse endpoints for all commands that execute SQL.
| Command | Connects to Coalesce Cloud | Connects to Warehouse |
|---|---|---|
coa init, coa create, coa run | No (most workflows) | Yes |
coa validate, coa doctor | No (most workflows) | Yes |
coa plan | Yes | Yes |
coa deploy | Yes | Yes |
coa refresh, coa rerun, coa cancel | Yes | Yes |
coa environments, coa nodes, coa runs | Yes | No |
coa workspace-nodes | Yes | No |
What's Next?
Continue with the rest of the CLI documentation when you need workflows, detailed command syntax, or troubleshooting help.
- Start here: Build Pipelines With the Coalesce CLI for local Node authoring, workspaces configuration, and validation.
- CLI Commands for
coacommand reference and flags. - Deploy Pipelines to the Coalesce App Using COA for plan, deploy, refresh, and managed Environments.
- CLI Support Policy & Usage Recommendations for supported versions and upgrade practices.
- Troubleshoot the Coalesce CLI for common errors and diagnostic steps.