Documentation index: llms.txt. This page is also available as markdown: append .md to this URL or send Accept: text/markdown.
Databricks
This integration covers both Unity Catalog and non-Unity Catalog (Hive) Databricks.
This integration is to be replicated for each workspace you want to integrate with Catalog.
Requirements
- You must be a Databricks administrator and Metastore Admin of the workspace to integrate.
- OAuth M2M authentication requires a service principal with appropriate permissions.
- For identity-federated workspaces, the service principal must also be granted the account admin role to extract account-level users.
To create a service principal, follow the instructions for your cloud provider:
1. Generate OAuth Credentials
Once you have created a service principal:
- Click on the service principal.
- Navigate to the OAuth secrets tab.
- Click Generate secret.
- Important: Copy both the Client ID and Client Secret immediately - the secret will only be shown once.
2. Retrieve Your host
Your host or instance name can be found in your Databricks URL: https://<instance-name>.cloud.databricks.com or https://<instance-name>/.
3. Retrieve Your HTTP path
Your http_path identifies the compute resource that Coalesce will use to query metadata. The location differs between SQL warehouses and clusters. For more details, see the Databricks compute details documentation.
For Clusters:
- Log in to your Databricks workspace.
- In the sidebar, click Compute.
- Select your cluster.
- On the Configuration tab, expand Advanced options.
- Click the JDBC/ODBC tab and copy the HTTP path.
For SQL Warehouses:
- Log in to your Databricks workspace.
- In the sidebar, click SQL Warehouses.
- Select your SQL warehouse.
- On the Connection details tab, copy the HTTP path.
4. Enable System Tables
To enable system tables, follow the Databricks system tables documentation.
After enabling system tables, grant your service principal access to the system catalog:
- In your Databricks workspace, go to Catalog and navigate to the
systemcatalog. - Click Permissions tab → Grant.
- Select your service principal and grant: USE CATALOG, USE SCHEMA, and SELECT.
5. Retrieve Your Account ID (Identity-Federated Workspaces)
If your workspace uses identity federation (users and groups are managed at the account level in Unity Catalog), you must provide your Account ID so Coalesce can extract users at the account level. If your workspace is not identity-federated, skip this step and leave the Account ID empty.
To find your account ID:
- Log in to the Databricks account console (for example,
https://accounts.cloud.databricks.com). - Click your username in the top-right corner.
- Copy the Account ID shown in the dropdown.
The service principal must also be granted the account admin role to extract account-level users.
6. Add Connection to Coalesce Catalog
Now that you have your OAuth credentials, add the Databricks integration to Coalesce:
-
Go to your integration page in Coalesce.
-
Click Add Integration and select Databricks.
-
Select Catalog Managed and name your integration.
-
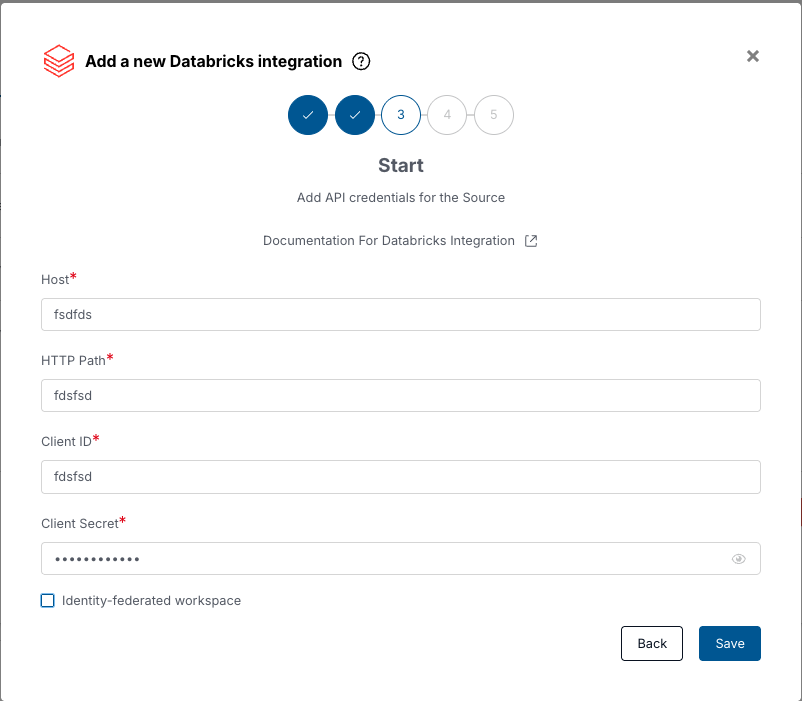
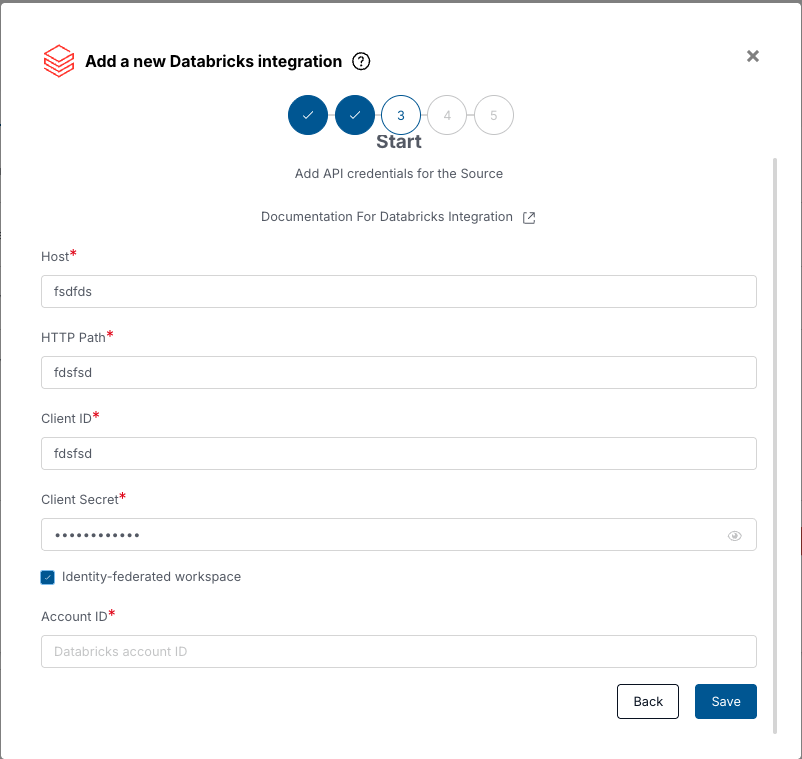
Fill in the credential fields:
- Host: Your Databricks workspace hostname (for example,
https://dbc-abc12345-6789.cloud.databricks.com) - HTTP Path: Your SQL warehouse path (for example,
/sql/1.0/warehouses/xxxxx) - Client ID: The OAuth client ID from your service principal
- Client Secret: The OAuth client secret from your service principal
- Account ID (only for identity-federated workspaces): Check Identity-federated workspace, then enter the Databricks account ID you retrieved in the previous section. Leave the checkbox unchecked for standard workspaces.
- Host: Your Databricks workspace hostname (for example,
For your first sync, it will take up to 48 hours and we will notify you when it is complete.